No edit summary |
No edit summary |
||
| Line 75: | Line 75: | ||
{{Note|NoteText=It is recommended to have map names named after the mod name, such as ''dow_myfirstmap''.}} |
{{Note|NoteText=It is recommended to have map names named after the mod name, such as ''dow_myfirstmap''.}} |
||
| + | |||
| + | == Placing assets == |
||
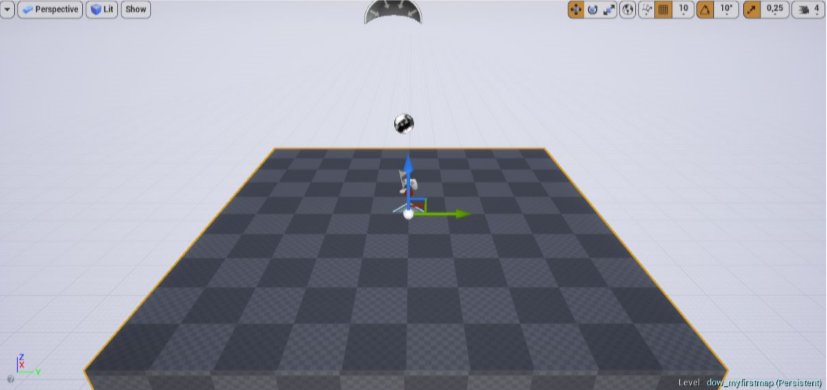
| + | After creating and saving the map, it should look somewhat like this: |
||
| + | |||
| + | [[File:EmptyMap.png|480px]] |
||
| + | |||
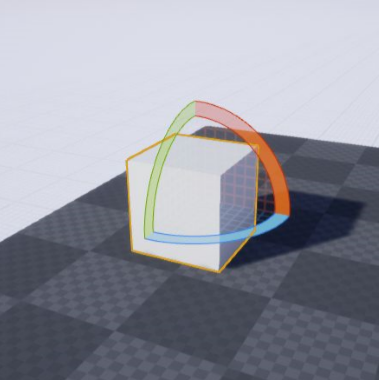
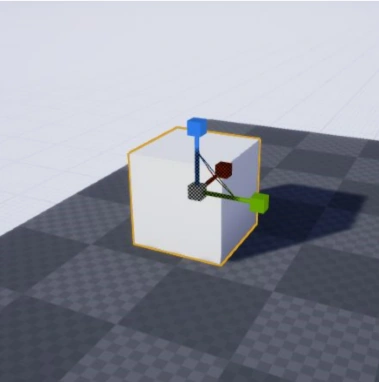
| + | Let's start by placing some cubes. To do this, drag the cubefrom the left ''Modes'' panel (tab ''Basic'') into the scene. You can now move the cube around using the three-dimensional "Gizmo". You can also change the Gizmo controls on the top right corner of the viewport (or using the keys 'W', 'E' and 'R') to control Location, Rotation and Scale. |
||
| + | |||
| + | <center> |
||
| + | {| |
||
| + | |[[File:Location.png|250x250px]] |
||
| + | |[[File:Rotate.png|250x250px]] |
||
| + | |[[File:Scale.png|250x250px]] |
||
| + | |} |
||
| + | </center> |
||
| + | |||
| + | |||
| + | {{Note|NoteText=Tip: to duplicate an object, try holding down the 'Alt'-key an drag any of the Gizmo arrows (in location mode). This will create a new instance of the object you are pulling}} |
||
Revision as of 23:25, 18 January 2020
For us at DrivenArts, modding is a huge step in the right direction. It embraces thousands of people wanting to make their own maps to play on, share them in the workshop, get feedback from other players and enjoy creating them. So, it was important to make the modding toolking as transparent as possible, and we hope that this will help introducing you into the vast creativity of making maps for Days of War.
Preparation
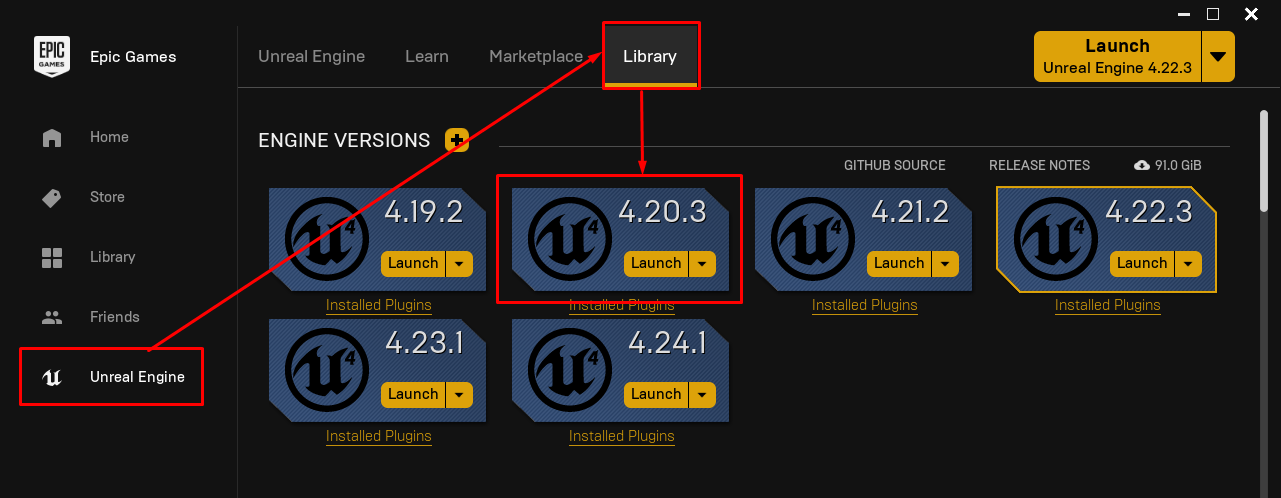
Days of War runs on the popular Unreal Engine 4. In order for you to start modding, you will need to download Unreal Engine 4.20 through the Epic Games Launcher. If you don't own the launcher already, you can download it here.
After you downloaded it, head to the Unreal Engine → Library tab and install Unreal Engine 4.20.
Obviously, you'll also need to download the Days of War Editor. TODO
Getting started
Once you downloaded the Days of War Editor, open it up! Don’t worry if it takes a bit to load, especially the first launch will take a while to prepare the content for use. Once it has loaded, you are good to go. Note that the editor layout might be different for you. You can drag all tabs across the screen and/or dock them at fixed points. Let’s have a little overview over the editor:
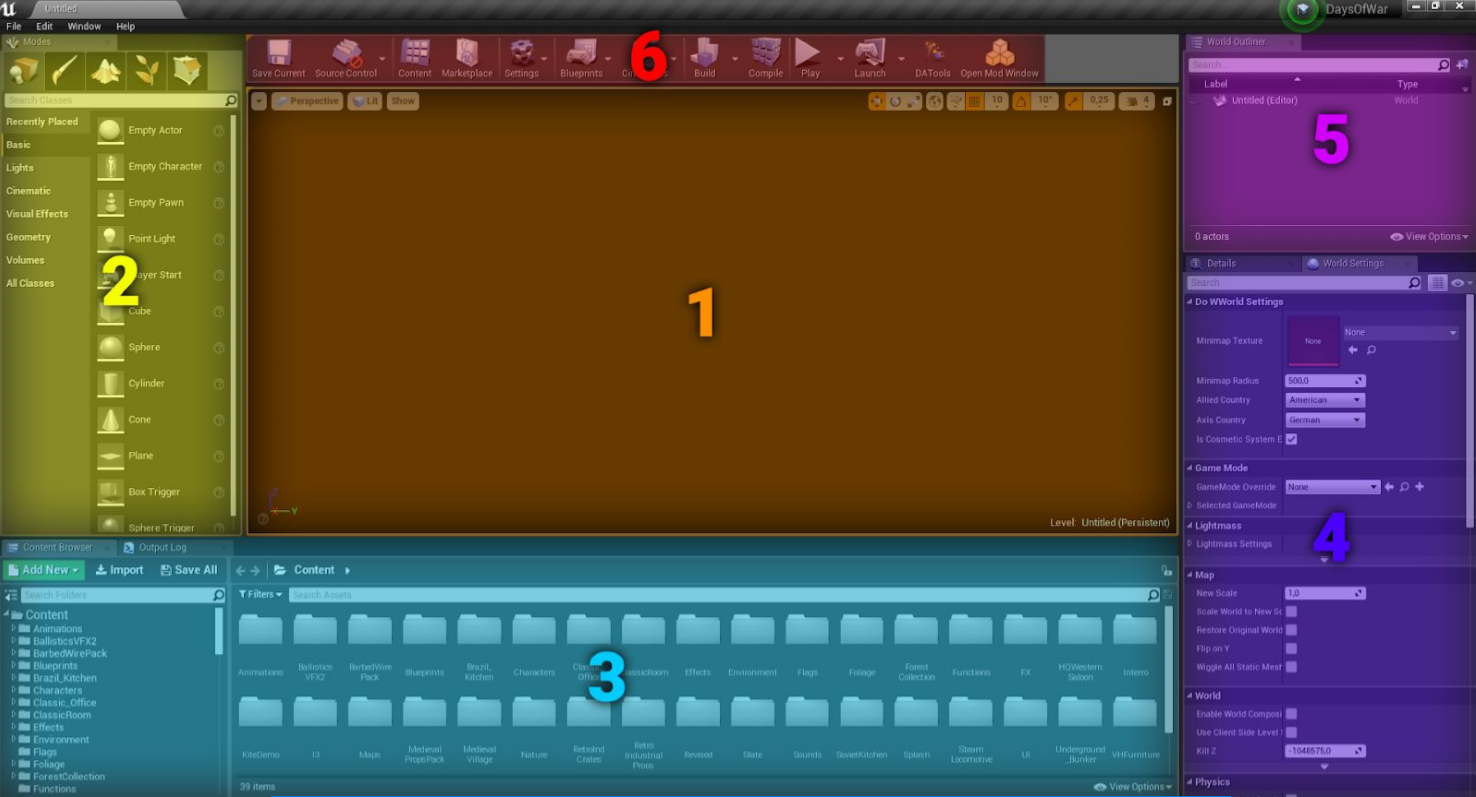
1: The main viewport
The core of the editor, the viewport. You can see the map you are editing live in here. To rotate the camera, hold down the right mouse button and move the mouse. To move, press W/A/S/D while holding down the right mouse button. You can also change the movement speed by turning the mouse wheel while holding down the right mouse button. To select objects in the scene, simply click on them. A gizmo will apear to move the object around in the scene. More on that in [Placing Assets].
2: Modes
This window is essential for level editing tools for the scene. The first tab ![]() is for placing objects (in Unreal they are called actors) in the scene. You can find primitive shapes, lights, visual effects and volumes in there. To place one of these, just drag them into the viewport. The other tabs are for mesh painting, creating landscapes, painting foliage (grass and trees) and geometry editing. For more information on Unreal’s level design features, see here.
is for placing objects (in Unreal they are called actors) in the scene. You can find primitive shapes, lights, visual effects and volumes in there. To place one of these, just drag them into the viewport. The other tabs are for mesh painting, creating landscapes, painting foliage (grass and trees) and geometry editing. For more information on Unreal’s level design features, see here.
3: The content browser
The Content Browser acts as a file/asset explorer. By clicking ![]() on the left-hand side you can open the directory tree view which helps a lot with navigation through the files. All content which ships with Days Of War is listed under Content. Content which comes from plugins and mods is listed below under <Plugin/ModName> Content. You can use the content browser to create new assets, import assets, and search for some while building your level.
on the left-hand side you can open the directory tree view which helps a lot with navigation through the files. All content which ships with Days Of War is listed under Content. Content which comes from plugins and mods is listed below under <Plugin/ModName> Content. You can use the content browser to create new assets, import assets, and search for some while building your level.
4: The details / world settings
The bottom right pane is used for showing the details of a currently selected object. If you don’t see anything in the Details tab, try selecting an object in the scene. You will be able to modify the location, rotation and scale of objects, change their collision settings, and modify a bunch of parameters which differ from object to object, e.g. for lights you can modify the intensity and color, for meshes you can change the model and material. Another tab which is useful and is suggested to put next to the details panel is the world settings. You can open them by navigating to Window → World Settings. Here you can find settings which are global for the whole map you are editing, such as the minimap texture, the factions the map should be played with and more.
5: The world outliner
The world outliner is simple: it lists all the objects (actors) you have in your scene. You can search them, group them in folders, and rename them for easier access. You can also hide/show certain actors and see their type.
6: The toolbar
The toolbar is the main place to execute actions from. You can save the current level, quick-change settings, open the level blueprint (more on that later), and test your map using the Play-In-Editor feature. Also, the mod window is linked there, which we will use now.
Creating a mod
Click on 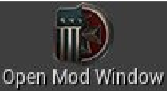 in the toolbar to open up the mod window.
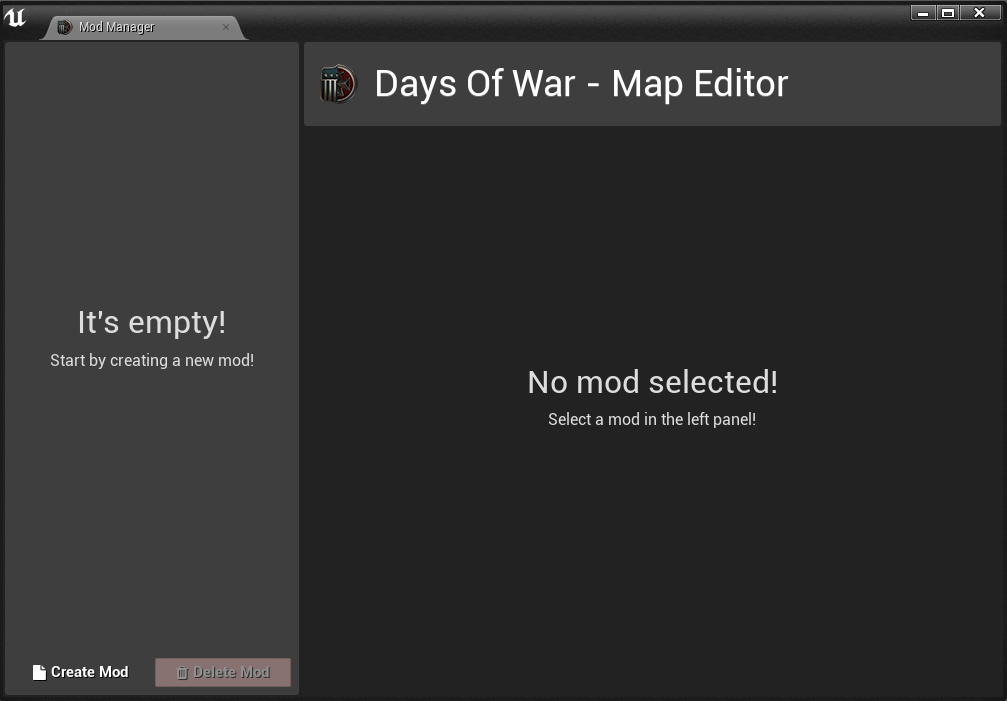
Click on Create Mod, enter the name of your new mod (e.g. myfirstmap) in the name text field and hit Enter. You will see your new mod appear in the list, and the content browser switches to the content directory of your new mod. That's all we need to do for now, so let's close the mod window again and look at the content browser.
As a good practice, you can always organize your imported assets in a directory structure like this:
| Meshes | Will contain new models you import |
|---|---|
| Materials | This will contain custom materials you create for meshes |
| Textures | Will contain textures for meshes (used by the materials) and/or UI. |
| Sounds | Put any new sounds in here |
| Blueprints | This will contain new blueprint scripts you create for your map |
| Maps | This will contain all maps of the mod |
Now that we have a new mod, let's create the map!
Creating the map
In the editor, navigate to File → New Level and choose either Default or Empty Level as a template. This will load up a new map for us to edit. Before we start building our level, click the ![]() button in the toolbar. This will prompt a new dialog for you to enter where the map should be saved.
button in the toolbar. This will prompt a new dialog for you to enter where the map should be saved.

Save your map in the Maps folder of your mod and name it.

|
Note!
It is recommended to have map names named after the mod name, such as dow_myfirstmap. |
Placing assets
After creating and saving the map, it should look somewhat like this:
Let's start by placing some cubes. To do this, drag the cubefrom the left Modes panel (tab Basic) into the scene. You can now move the cube around using the three-dimensional "Gizmo". You can also change the Gizmo controls on the top right corner of the viewport (or using the keys 'W', 'E' and 'R') to control Location, Rotation and Scale.

|
|
|
|
|
Note!
Tip: to duplicate an object, try holding down the 'Alt'-key an drag any of the Gizmo arrows (in location mode). This will create a new instance of the object you are pulling |